
Posted on May 10, 2005
Introduction
As with most people interested in PC construction, I have been putting together computers for many many years and was always depressed by the ugliness of the boxes available. The choice of "container" for your PC ranged from the medium box to the big box, only expanded recently with the small box. All these are boxes, and usually beige.
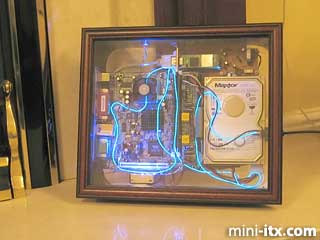
So as soon as small motherboards and importantly small PSUs became affordable I began to think about what I could do to hide a computer and perhaps turn it into an object that was unusual. I also wanted (and this is very very important for us married types) to get a PC into the living room, an area out of bounds to PCs due to my wife’s exclusion policy for the room. The Frame was born.
The "Frame" sits almost silent by our fire side (fire never used!) and is accessed remotely over the wireless network connection. The "Frame" is used as a file server, providing Video and Audio files out to other computers in the house. It is, however, still possible to connect the usual monitor/keyboard/mouse/speakers etc.
Parts List
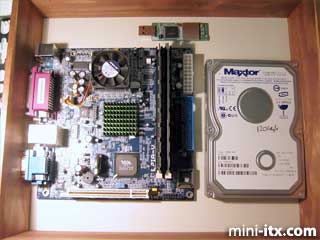
The project needed a small motherboard, small PSU and small HD. The following components were assembled:
• EPIA V10000 motherboard, 128MB RAM
• PW-200V PSU / EPIA-80W-Brick
• Maxtor 120GB HDD
• 54Mb Wireless USB LAN card
• Blue Sound activated Electro Luminescent (EL) string
• Blue Lazer LEDs
• Large picture frame (from a craft shop)
• Sheet of polycarbonate (scrap bin)
Measuring up and mounting
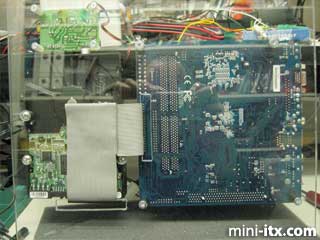
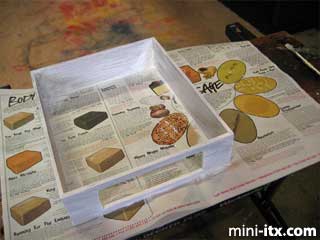
I picked a frame that would fit all the components, arranged to produce the lowest profile possible then mounted these to a sheet of polycarbonate cut such that it will mount onto the back of the picture frame’s box sides.
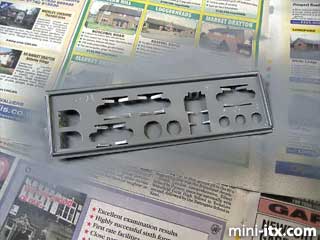
The frame’s surround, made of wood, was cut to accept the motherboard’s utilities and painted black.
 |
 |
 |
Quick Links
Mailing Lists:
Mini-ITX Store
Projects:
Show Random
Accordion-ITX
Aircraft Carrier
Ambulator 1
AMD Case
Ammo Box
Ammo Tux
AmmoLAN
amPC
Animal SNES
Atari 800 ITX
Attache Server
Aunt Hagar's Mini-ITX
Bantam PC
BBC ITX B
Bender PC
Biscuit Tin PC
Blue Plate
BlueBox
BMW PC
Borg Appliance
Briefcase PC
Bubbacomp
C1541 Disk Drive
C64 @ 933MHz
CardboardCube
CAUV 2008
CBM ITX-64
Coelacanth-PC
Cool Cube
Deco Box
Devilcat
DOS Head Unit
Dreamcast PC
E.T.PC
Eden VAX
EdenStation IPX
Encyclomedia
Falcon-ITX
Florian
Frame
FS-RouterSwitch
G4 Cube PC
GasCan PC
Gingerbread
Gramaphone-ITX-HD
GTA-PC
Guitar PC
Guitar Workstation
Gumball PC
Hirschmann
HTPC
HTPC2
Humidor 64
Humidor CL
Humidor II
Humidor M
Humidor PC
Humidor V
I.C.E. Unit
i64XBOX
i-EPIA
iGrill
ITX Helmet
ITX TV
ITX-Laptop
Jeannie
Jukebox ITX
KiSA 444
K'nex ITX
Leela PC
Lego 0933 PC
Legobox
Log Cabin PC
Lunchbox PC
Mac-ITX
Manga Doll
Mantle Radio
Mediabox
Mega-ITX
Micro TV
Mini Falcon
Mini Mesh Box
Mini-Cluster
Mobile-BlackBox
Moo Cow Moo
Mr OMNI
NAS4Free
NESPC
OpenELEC
Osh Kosh
Pet ITX
Pictureframe PC
Playstation 2 PC
Playstation PC
Project NFF
PSU PC
Quiet Cubid
R2D2PC
Racing The Light
RadioSphere
Restomod TV
Robotica 2003
Rundfunker
SaturnPC
S-CUBE
SEGA-ITX
SpaceCase
SpacePanel
Spartan Bluebird
Spider Case
Supra-Server
Teddybear
Telefunken 2003
TERA-ITX
The Clock
ToAsTOr
Tortoise Beetle
Tux Server
Underwood No.5
Waffle Iron PC
Windows XP Box
Wraith SE/30
XBMC-ION