
Posted on August 5, 2005
Introduction
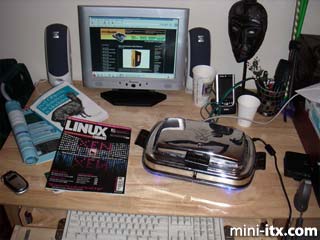
Here is my Waffle Iron PC. I used an EPIA M10000 Mini-ITX board. It has 512MB RAM and a 160GB hard drive. I used an external USB CDROM to install the OS. It runs Linux - Fedora Core 2. It's also got a TV Out card, so I can use this for a MythTV box if I choose later.
This is my second attempt at modding. I made another machine out of a metal suitcase. It came out great! But I'd already seen others on the net. Ever since then I've had the itch to make something cooler that no one else had done. I kept scouting antique places for something retro but with a futuristic feel. I like the mix of old with new. I also love CHROME! My motorcycle has tons of it...
Construction
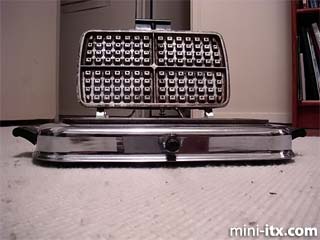
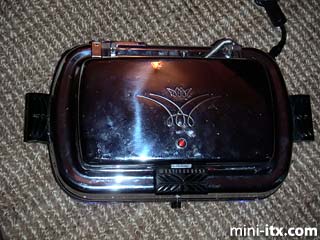
This is the waffle iron before modification. I found it at an antique store. The waffle iron didn't work. But that's OK - I didn't like the idea of destroying a working piece of history.

I removed the original power cord. I kept the piece of locking plastic there. I hollowed it out and put the power plug inside of it. When you plug the power cord into it it looks like you're using the original cord. I use an external power source. The power supply actually plugs right into the ATX socket on the mother board and you use an external 12v power supply with it.
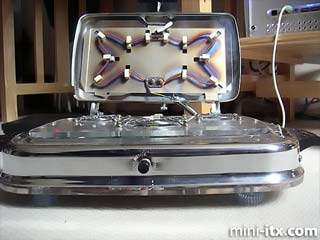
This is the waffle iron, open and unlit. The black knob in the front is the power switch. It looks like the original. I wanted to keep as much of the original feel as possible. Directly underneath the power button is a reset button.
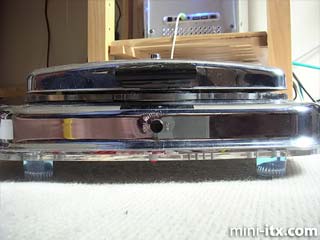
This is the waffle iron closed. I put clear rubber grommets on the Acrylic plate where the bottom griddle used to be. There is a recessed piece of Acrylic in the lid. When I close the lid it holds the lid up about a quarter of an inch all the way around. This allows air to flow in even when the lid is closed. Also since the upper Acrylic sheet is sunken in, there is plenty of airflow inside even when the lid is down. There is also a little vent space between the base piece as well.
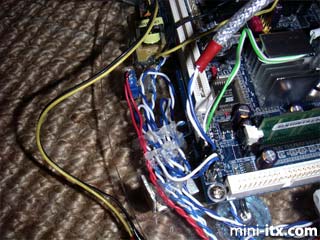
I used a hot glue gun to glue down the wires to the base. Space is limited so I did anything I could to maximize air flow.
This is a shot from the top. Notice I placed the power L.E.D. in where the original power light was.
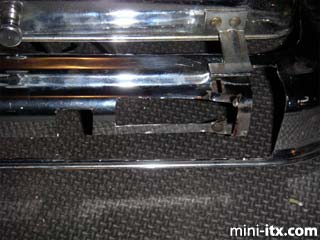
Here is some dremel work. I used a dremel and various files for all of the cutting.
 |
 |
 |
Quick Links
Mailing Lists:
Mini-ITX Store
Projects:
Show Random
Accordion-ITX
Aircraft Carrier
Ambulator 1
AMD Case
Ammo Box
Ammo Tux
AmmoLAN
amPC
Animal SNES
Atari 800 ITX
Attache Server
Aunt Hagar's Mini-ITX
Bantam PC
BBC ITX B
Bender PC
Biscuit Tin PC
Blue Plate
BlueBox
BMW PC
Borg Appliance
Briefcase PC
Bubbacomp
C1541 Disk Drive
C64 @ 933MHz
CardboardCube
CAUV 2008
CBM ITX-64
Coelacanth-PC
Cool Cube
Deco Box
Devilcat
DOS Head Unit
Dreamcast PC
E.T.PC
Eden VAX
EdenStation IPX
Encyclomedia
Falcon-ITX
Florian
Frame
FS-RouterSwitch
G4 Cube PC
GasCan PC
Gingerbread
Gramaphone-ITX-HD
GTA-PC
Guitar PC
Guitar Workstation
Gumball PC
Hirschmann
HTPC
HTPC2
Humidor 64
Humidor CL
Humidor II
Humidor M
Humidor PC
Humidor V
I.C.E. Unit
i64XBOX
i-EPIA
iGrill
ITX Helmet
ITX TV
ITX-Laptop
Jeannie
Jukebox ITX
KiSA 444
K'nex ITX
Leela PC
Lego 0933 PC
Legobox
Log Cabin PC
Lunchbox PC
Mac-ITX
Manga Doll
Mantle Radio
Mediabox
Mega-ITX
Micro TV
Mini Falcon
Mini Mesh Box
Mini-Cluster
Mobile-BlackBox
Moo Cow Moo
Mr OMNI
NAS4Free
NESPC
OpenELEC
Osh Kosh
Pet ITX
Pictureframe PC
Playstation 2 PC
Playstation PC
Project NFF
PSU PC
Quiet Cubid
R2D2PC
Racing The Light
RadioSphere
Restomod TV
Robotica 2003
Rundfunker
SaturnPC
S-CUBE
SEGA-ITX
SpaceCase
SpacePanel
Spartan Bluebird
Spider Case
Supra-Server
Teddybear
Telefunken 2003
TERA-ITX
The Clock
ToAsTOr
Tortoise Beetle
Tux Server
Underwood No.5
Waffle Iron PC
Windows XP Box
Wraith SE/30
XBMC-ION