
Posted on July 6, 2003
Introduction
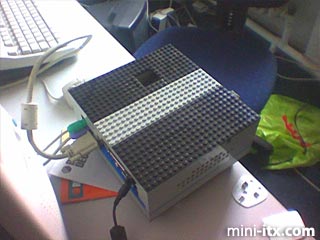
I've always wanted a small portable PC for when I'm visiting my parents in Scotland (to be frank their PC is well past it's sell by date) and Mini-ITX seemed like the obvious solution, but what about the case, then I thought, why not just make one myself, out of Lego, so that's exactly what I did. The machine is base around the EPIA M9000 Mini-ITX motherboard at 933 MHz, with a slim line DVD-ROM drive and 30 GB laptop hard disk drive.
I'd like to apologise in advance for the quality of the images, they were taken with a Nokia 3650, the only digital camera I had available at the time.
Concept
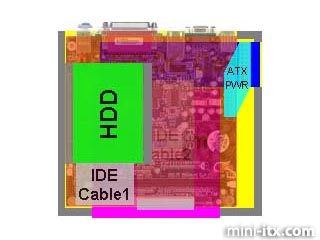
The first thing I needed to do was to work out just how to layout all the components, I needed a plan before I even considered constructing the machine, so to this end I came up with the image to the left, the original was a multi-layer Paint Shop Pro image so I could view each layer individually and stack them properly, as you'll see the finished layout is pretty close to this design, which given the that I drew this layout up from dimensions from the Mini-ITX store, is pretty incredible.
Prototype 1
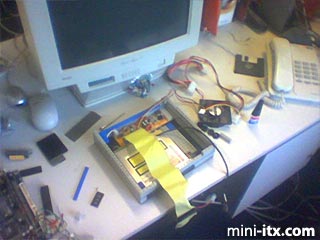
My first prototype wasn't really a case (as you can see from the photograph), but it did give me a clear idea of how the components would fit together, the main reason for this was that I was awaiting my bulk order of bricks and was working with bricks I already owned to make this layout prototype. I did learn a few things at this stage (and one almost fatal mistake) I learnt that I needed 26x24 bricks for the case, that a slim line DVD-ROM drive is exactly 16 blocks wide.
|
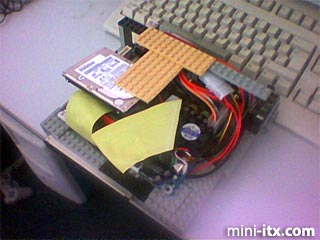
The almost fatal mistake came because I couldn't fit the hard drive as pictured above, so I mounted it sideways, sitting over the Northbridge heatsink, now with hindsight I should have realised that this would be a problem, but when I'd put the components together and installed windows on it the hard drive hadn't got warm so I assumed it wouldn't run hot, and would be safe enough. As you can also see in this picture the IDE cables are a bit unwieldy, and have a tendency to want to be connected the wrong way up on the drive, meaning lots of twists and kinks in the cables. I was now sure that I could build this PC the way I wanted it, I was just waiting on the Lego bricks before I could start.
Prototype 2
Well my Lego had arrived, I was almost ready to go, but being prudent I decided that I should build another prototype of the full case before going ahead and super-gluing the whole thing together, this was to prove to be a blessing without this I would have run into serious heat problems and ended up with an unusable machine. I don't have any pictures of this phase of the construction, but I do have some pictures of the machine up and running.
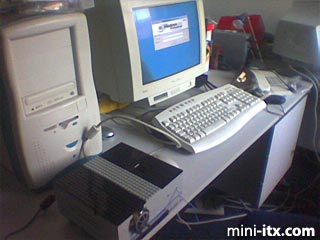
Notice the hole in the top this was supposed to be a vent for the processor fan, however this machine overheated not because of the processor, but the Northbridge heatsink, which as noted earlier I'd blocked with the HDD and IDE cable, this mean I needed a redesign, for which I went back to my original plan and mounted the HDD to the left of the case.
The Build
I started by taking my final prototype, turning it upside down and working from the bottom up, stripped the original case down and started building the new machine from the ground up, gluing as I went.
This was the easy part, a glued a bunch of plates together to form a base, and then built a 2 deep wall all the way around with space for the DVD drive, the DC to DC converter fits into bricks with a slot down the side, this has the dual effect of both moving the board half a block to the right, and holding it in place inside the machine. (Notice the big fan, I was thinking about using this for cooling, but decided against it since it was too hard to mount properly)
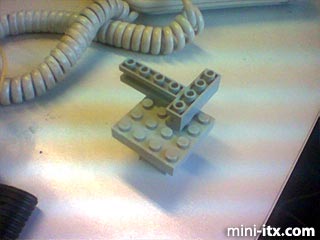
I'm rather pleased with this little construction, this is to hold the bottom right corner of the motherboard in place the corner of the board slides nicely into the slots in the two bricks, solving the problem of keeping the board in place very nicely.

And you can see it in place here, notice the four circular bricks just outside the case, those are the feet for the PC
 |
 |
 |
Quick Links
Mailing Lists:
Mini-ITX Store
Projects:
Show Random
Accordion-ITX
Aircraft Carrier
Ambulator 1
AMD Case
Ammo Box
Ammo Tux
AmmoLAN
amPC
Animal SNES
Atari 800 ITX
Attache Server
Aunt Hagar's Mini-ITX
Bantam PC
BBC ITX B
Bender PC
Biscuit Tin PC
Blue Plate
BlueBox
BMW PC
Borg Appliance
Briefcase PC
Bubbacomp
C1541 Disk Drive
C64 @ 933MHz
CardboardCube
CAUV 2008
CBM ITX-64
Coelacanth-PC
Cool Cube
Deco Box
Devilcat
DOS Head Unit
Dreamcast PC
E.T.PC
Eden VAX
EdenStation IPX
Encyclomedia
Falcon-ITX
Florian
Frame
FS-RouterSwitch
G4 Cube PC
GasCan PC
Gingerbread
Gramaphone-ITX-HD
GTA-PC
Guitar PC
Guitar Workstation
Gumball PC
Hirschmann
HTPC
HTPC2
Humidor 64
Humidor CL
Humidor II
Humidor M
Humidor PC
Humidor V
I.C.E. Unit
i64XBOX
i-EPIA
iGrill
ITX Helmet
ITX TV
ITX-Laptop
Jeannie
Jukebox ITX
KiSA 444
K'nex ITX
Leela PC
Lego 0933 PC
Legobox
Log Cabin PC
Lunchbox PC
Mac-ITX
Manga Doll
Mantle Radio
Mediabox
Mega-ITX
Micro TV
Mini Falcon
Mini Mesh Box
Mini-Cluster
Mobile-BlackBox
Moo Cow Moo
Mr OMNI
NAS4Free
NESPC
OpenELEC
Osh Kosh
Pet ITX
Pictureframe PC
Playstation 2 PC
Playstation PC
Project NFF
PSU PC
Quiet Cubid
R2D2PC
Racing The Light
RadioSphere
Restomod TV
Robotica 2003
Rundfunker
SaturnPC
S-CUBE
SEGA-ITX
SpaceCase
SpacePanel
Spartan Bluebird
Spider Case
Supra-Server
Teddybear
Telefunken 2003
TERA-ITX
The Clock
ToAsTOr
Tortoise Beetle
Tux Server
Underwood No.5
Waffle Iron PC
Windows XP Box
Wraith SE/30
XBMC-ION